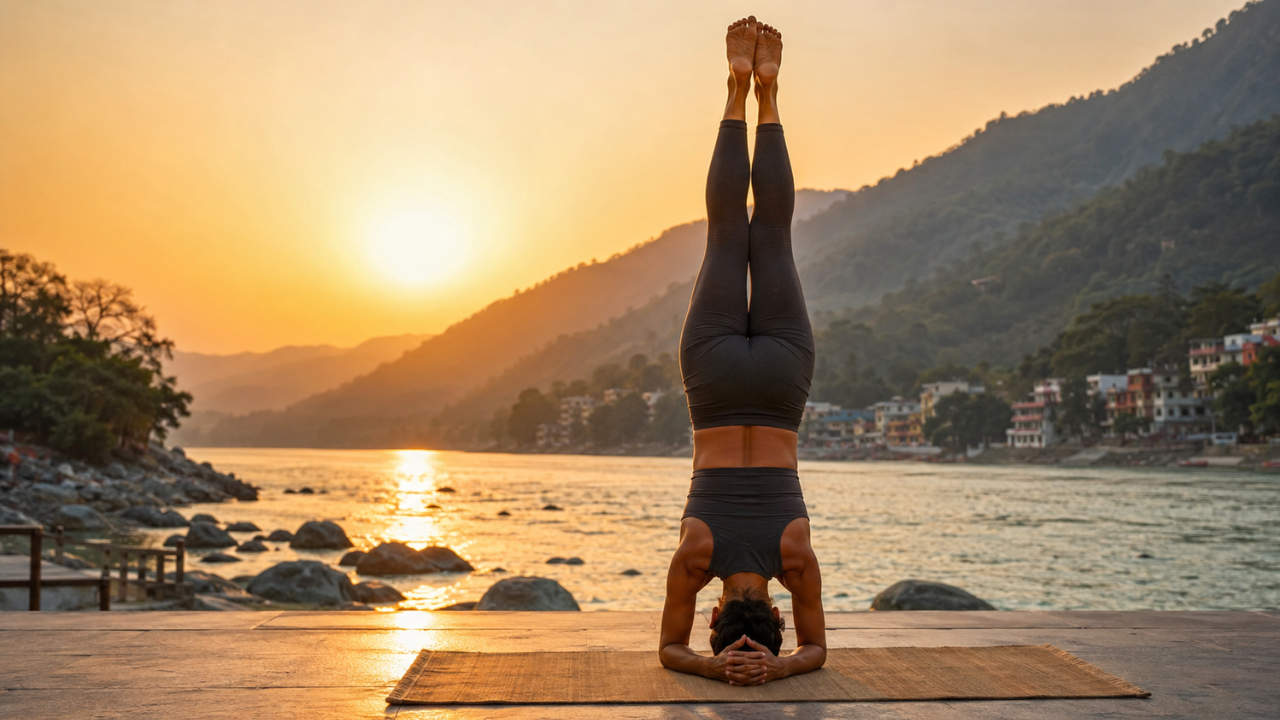
Headstand is the pose most people dream about when they start yoga. It looks powerful. It looks impossible. But with the right steps and a little patience — it becomes one of the most beautiful poses in your practice.
Yogis call it the King of All Asanas. Not just for how it looks — but for everything it does for your body and mind. Better focus. Stronger shoulders. A calmer nervous system. All in one pose.
What Is Headstand (Sirsasana)?
Headstand is called Sirsasana in Sanskrit. "Sirsa" means head. So this pose is simply the head pose — where your whole body turns upside down and balances on the crown of the head and forearms.
In this pose, your forearms press firmly into the mat forming a stable triangle. Your head rests lightly on the floor between the hands. Your core lifts the legs slowly upward until the whole body is straight — feet pointing to the sky, spine long and vertical.
- Sanskrit name: Sirsasana
- Meaning: Headstand / Head Pose
- Pose type: Inversion / Arm balance
- Level: Intermediate to advanced
- Hold time: 10 seconds to 5 minutes (build slowly)
- Also called: King of All Asanas
- Part of: Hatha yoga, Iyengar yoga, Ashtanga yoga sequences
This pose usually comes after building strength in Dolphin Pose, Downward Dog, and core work. If you can hold a strong Dolphin for 1 minute — you are ready to start learning Headstand.
Benefits of Headstand (Sirsasana)
Headstand is called the King of Asanas for a reason. It touches every part of your body — from brain to toes. Here is what regular practice gives you.
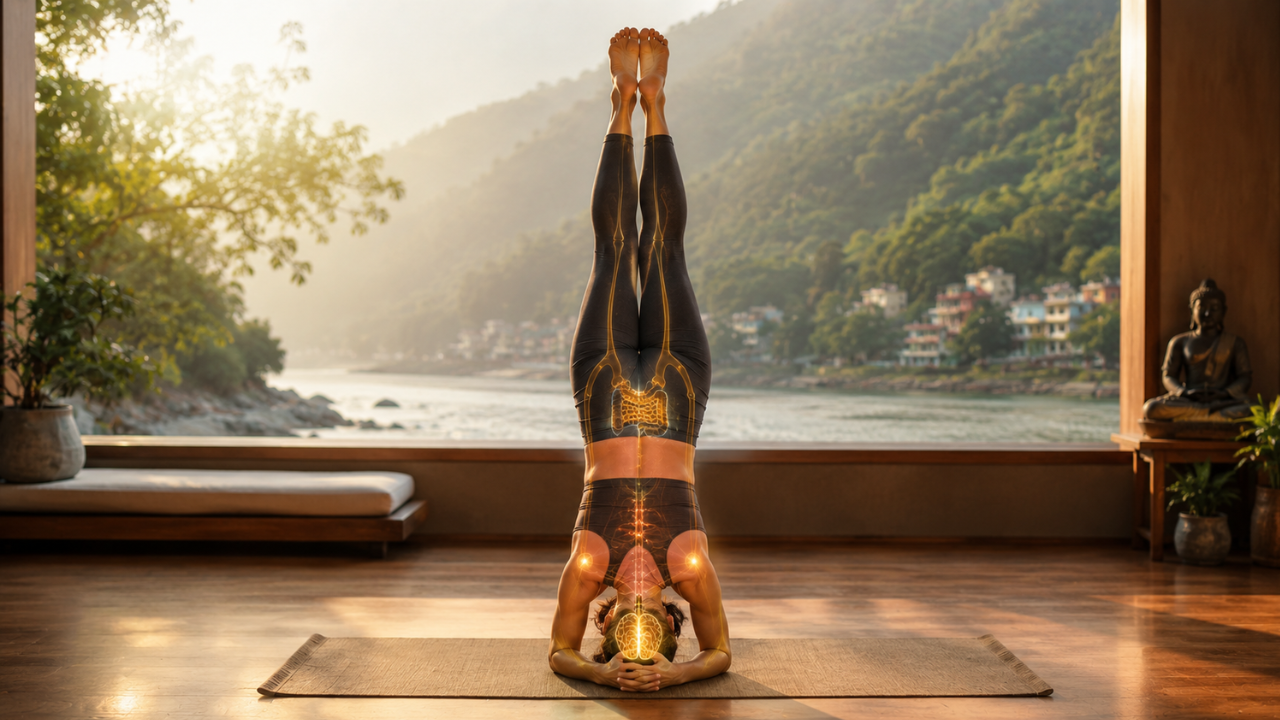
- Better blood flow to the brain: Being upside down sends fresh blood to your head. This improves focus, memory, and mental clarity.
- Stronger shoulders and arms: Your forearms and shoulders carry the weight. Over time they become noticeably stronger and more stable.
- Core strength: Lifting and holding the legs up straight needs a very strong belly and lower back. The core gets a deep workout every time.
- Calmer mind: Inversions activate the parasympathetic nervous system — the rest-and-digest mode. Stress drops. The mind gets quiet.
- Better digestion: Reversing gravity helps move things along in the digestive system. Many people notice better gut health with regular practice.
- Healthy scalp and hair: Increased blood flow to the scalp nourishes hair roots. Many practitioners notice thicker, healthier hair over time.
- Improved balance and coordination: Balancing upside down trains the whole nervous system and sharpens total body awareness.
- Stronger spine: Holding the body straight in an inversion builds deep postural muscles that support the spine all day long.
- Hormonal balance: Inversions gently stimulate the pituitary and pineal glands — which play a key role in hormonal health and mood.
People who practice Headstand even a few times a week often say they feel sharper, calmer, and more grounded throughout the day. It is one of the most complete poses in all of yoga.
How to Do Headstand — Step by Step
Do not rush this. Each step is important. Read through everything once — then go slowly on your mat. If possible, have a teacher or friend nearby for your first few tries.
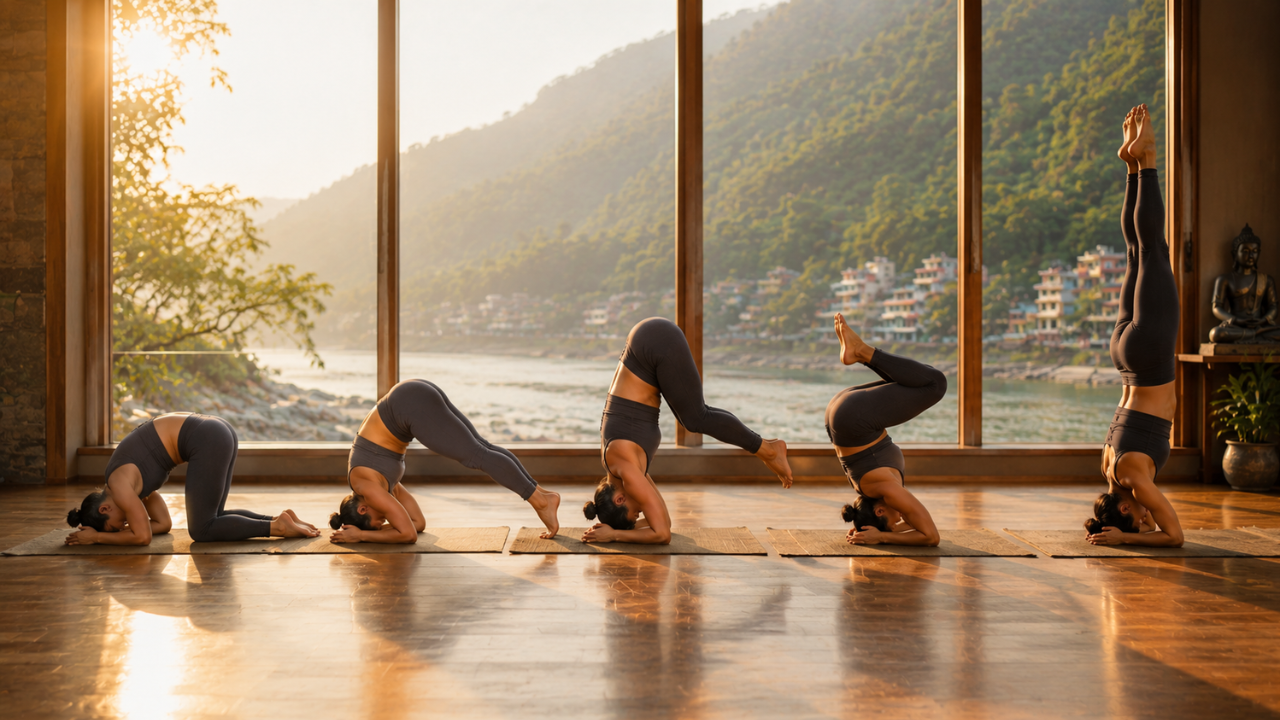
- Step 1 — Set up the base: Kneel on the mat. Place your forearms down shoulder-width apart. Interlace the fingers firmly. The forearms and hands make a triangle — this is your foundation.
- Step 2 — Place the head: Set the crown of the head gently on the mat. The back of the head should rest lightly against the cupped hands. Do not put weight on the forehead or back of the skull.
- Step 3 — Lift the hips: Tuck the toes and lift the knees off the mat. Walk the feet closer to the head until the hips are directly above the shoulders.
- Step 4 — Press the forearms down: This is very important. Push the forearms actively into the mat. Most of the weight should be in the forearms — not the head and neck.
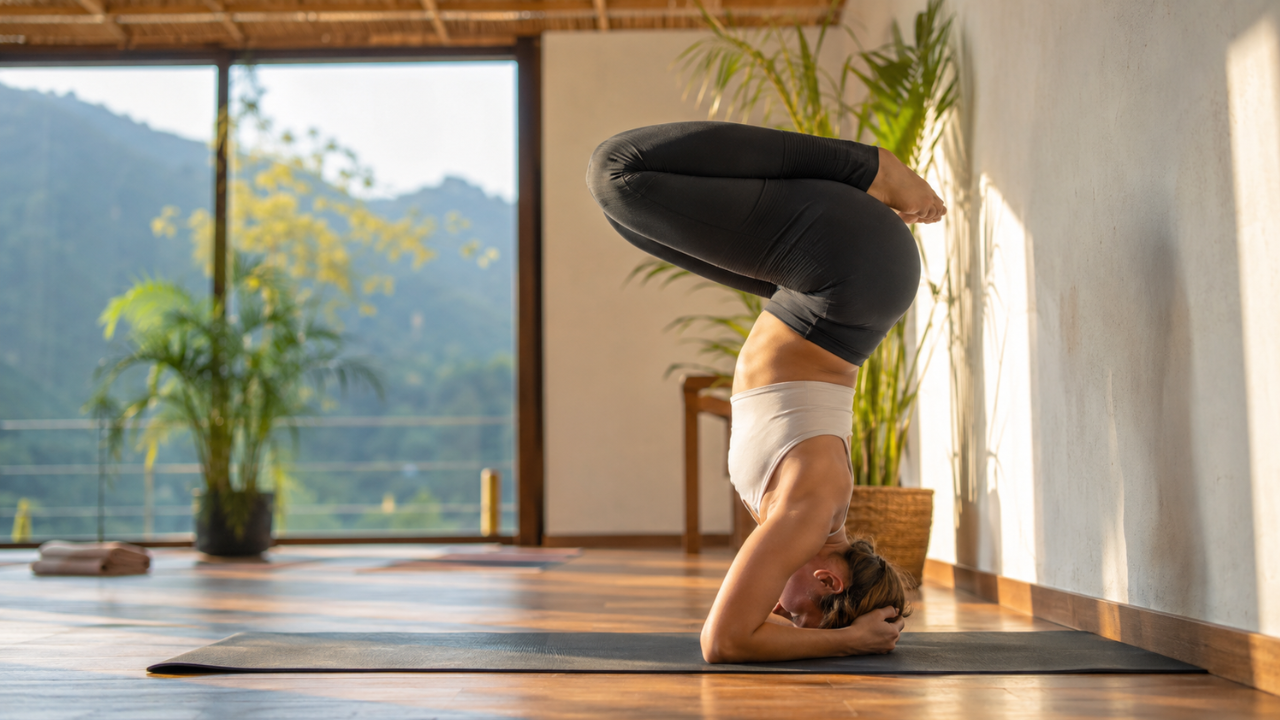
- Step 5 — Lift one leg first (beginner option): Slowly lift one knee toward the chest. Hold here and breathe. Then try lifting the second knee up. Both knees are now at the chest in a tucked position.
- Step 6 — Straighten the legs slowly: From the tucked position, slowly extend both legs straight up. Squeeze the inner thighs together. Flex the feet and reach through the heels toward the ceiling.
- Step 7 — Hold the pose: Breathe steadily. Keep the shoulders lifting away from the ears. Core stays firm. Legs stay straight and active. Hold for as long as comfortable.
- Step 8 — Come down slowly: Bend the knees first. Lower both legs together with control. Never crash down. Rest in Child's Pose for 5 to 10 breaths afterward.
Always come down before your arms start shaking. It is better to hold for 15 steady seconds than to collapse from a 2-minute attempt. Safety first — strength builds with time.
Key Alignment Tips for Headstand
Good alignment is what makes Headstand safe. Bad alignment is what causes injury. Keep these points in mind every single time you practice.
- Crown of the head only: Only the very top center of the skull touches the mat. Never the forehead, never the back of the head.
- Forearms take the weight: Press the forearms and elbows actively downward. The head should feel almost light — like it is just touching, not carrying.
- Shoulders away from ears: Lift the shoulders up and away from the ears actively. This protects the neck and creates space in the upper spine.
- Straight spine: The whole body should make one straight vertical line — heels, hips, shoulders, and crown all stacked in one line.
- Core engaged throughout: The belly pulls gently inward. The lower back stays long — not arched. Core engagement is what keeps the pose stable.
- Legs strong and together: Press the inner thighs together. Flex the feet. Reach through the heels. The legs should be active — not just hanging up.
- Elbows shoulder-width: Keep the elbows exactly shoulder-width apart throughout the pose. Elbows wider than shoulders loses power and stability.
- Gaze: Look gently forward at the floor in front of you. Soft, relaxed eyes help the whole body stay calm.
Work on one alignment point at a time. In the beginning, just focus on pressing the forearms down and keeping the shoulders up. The rest of the alignment comes as you get stronger and more confident.
Common Mistakes to Avoid in Headstand
These are the mistakes that happen most often. Some of them are dangerous. Read this section carefully before you practice.
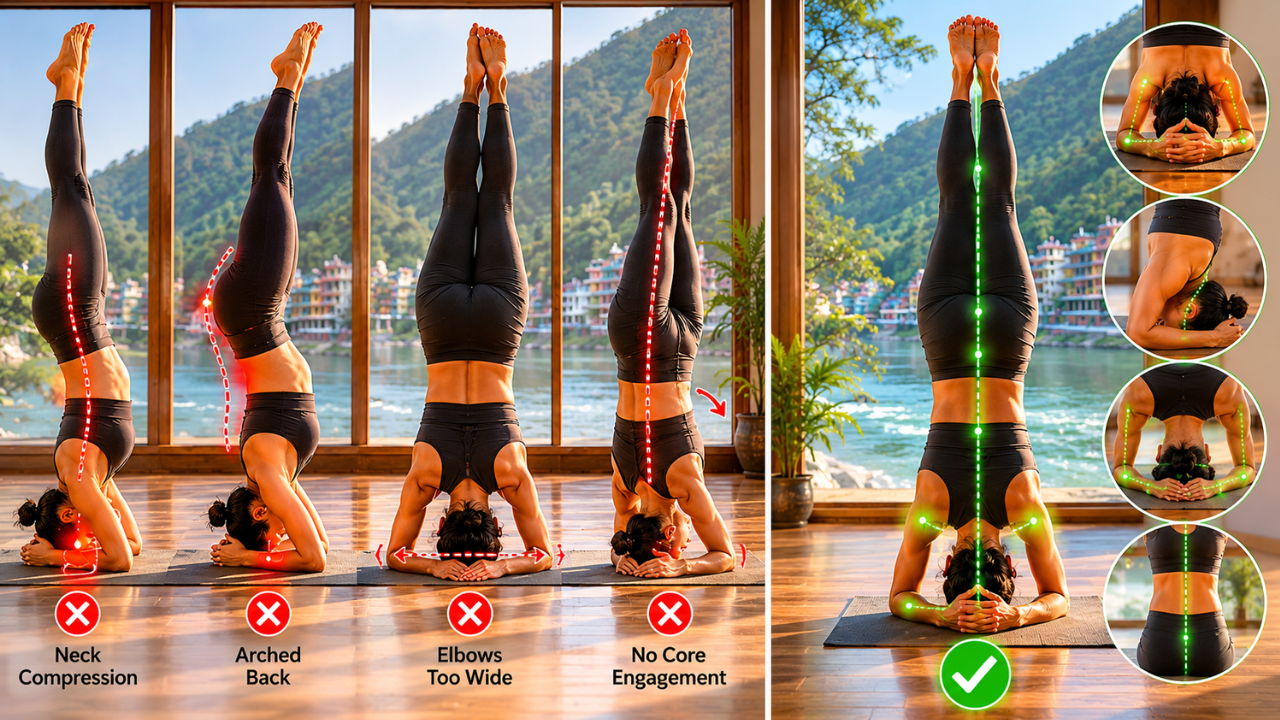
- Too much weight on the neck: This is the biggest danger. If your neck carries most of the weight, you risk serious injury. Forearms should bear the load — always.
- Kicking up too fast: Kicking up with force instead of lifting with control throws off alignment and is dangerous. Always go up slowly and with awareness.
- Skipping preparation: Going into Headstand without first building shoulder and core strength is a recipe for falling or hurting the neck. Do Dolphin Pose and forearm plank first.
- Lower back arching: When the lower back collapses into an arch, the spine is under strain. Keep the belly engaged and the back straight throughout.
- Elbows too wide: Elbows wider than shoulders makes the base unstable. Always keep elbows directly below the shoulders.
- Forgetting to breathe: Many beginners hold the breath in Headstand. This raises blood pressure and shortens the hold time. Keep breathing slowly and steadily.
- Coming down without control: Crashing down from Headstand can hurt the neck or back. Always lower the legs with full control — slowly, with the core engaged.
Beginner Prep Steps and Modifications
Not ready for the full pose yet? That is completely fine. Start here. These prep steps build the exact strength and awareness you need.
- Dolphin Pose first: This is the best prep for Headstand. It builds shoulder strength, opens the upper back, and teaches you the forearm base. Hold Dolphin for 30 to 60 seconds daily.
- Practice against a wall: Set up your forearm triangle close to a wall. Walk the feet in and lift the hips. Then try lifting one leg at a time and resting the heel on the wall. The wall catches you if you tip — so you can relax and focus on alignment.
- Half Headstand (Knees tucked): Instead of going straight up, lift the hips and draw both knees to the chest. Hold here in a tucked position. This builds the core strength needed for the full expression.
- Forearm Plank holds: Holding a forearm plank for 30 to 60 seconds builds the exact shoulder and core strength Headstand needs. Do this daily as a prep exercise.
- Practice with a partner: Have someone hold your ankles as you lift up. A spotter takes the fear away so your body can find the correct position more easily.
Rushing into Headstand is the only way to get hurt. Taking your time with prep work is not weakness — it is wisdom. The strongest headstanders in the world built their pose slowly, step by step.
Safety Tips — Practice Headstand Wisely
Headstand is safe when practiced correctly. These tips will keep you protected every time you go upside down.
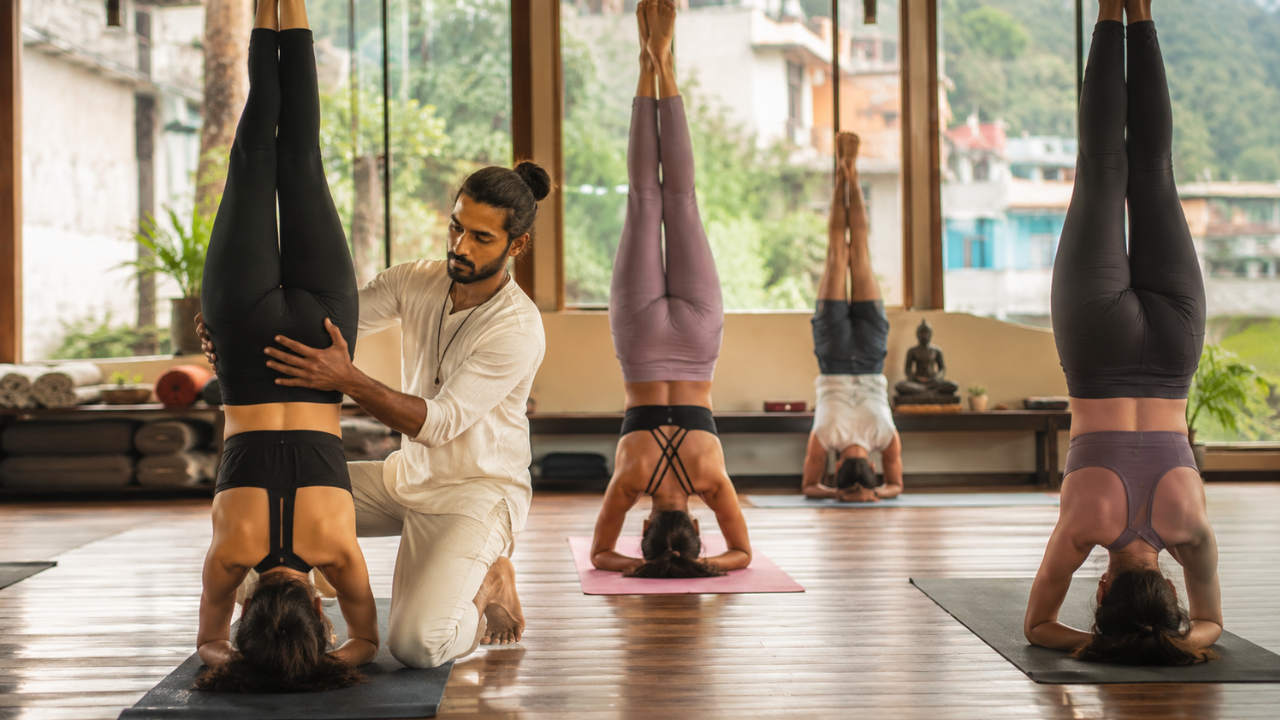
- Learn from a teacher first: Headstand is the one pose where self-teaching without guidance carries real risk. A qualified teacher watches your neck, your base, and your entry — and catches mistakes before they become injuries.
- Use a folded blanket under the head: A folded yoga blanket under the crown of the head adds gentle cushioning for the skull and helps beginners feel more comfortable.
- Never practice when tired: Headstand needs full mental presence and physical strength. Never attempt it when you are fatigued, distracted, or unwell.
- Always rest in Child's Pose after: Spend 5 to 10 breaths in Child's Pose after every Headstand. This allows blood pressure to normalize and the nervous system to settle.
- Build hold time slowly: Start with 10 to 15 seconds. Add 5 seconds each week. Do not try to rush to 5 minutes in a month. The neck and shoulders need time to adapt to the load.
- Stop immediately if there is neck pain: Any sharp or pinching sensation in the neck means you should come down right away. Check your forearm pressure and head placement before trying again.
- Practice on a non-slip surface: Make sure your mat and forearms do not slip. A sticky mat or a folded blanket gives the forearms better grip and prevents collapse.
Who Should Avoid Headstand?
Headstand is powerful — and that means it is not right for everyone. Please read this section carefully.
- High blood pressure: Being upside down raises pressure in the head and eyes. This is not safe for those with uncontrolled hypertension.
- Glaucoma or eye pressure issues: Inversions increase pressure inside the eyes. Anyone with glaucoma or retinal problems should avoid this pose completely.
- Neck or cervical spine injury: Any history of neck pain, disc problems, or cervical spine injury means Headstand should be avoided unless cleared by a doctor.
- Heart conditions: Those with heart disease or a history of stroke should not practice Headstand without medical clearance.
- During menstruation: Traditional yoga recommends avoiding inversions during menstruation as they may disrupt the natural downward flow of energy.
- Pregnancy: Headstand is not recommended during pregnancy, especially for those who did not have an established inversion practice before becoming pregnant.
- Vertigo or inner ear issues: Being upside down with vertigo can be disorienting and dangerous. Avoid until the condition is resolved.
If you are unsure whether Headstand is right for you — always check with your doctor and a qualified yoga teacher. There is no shame in modifying or skipping a pose. Your safety always comes first.
Quick Checklist — Is Your Headstand Safe and Correct?
Run through this list every time you are in the pose. If everything checks out — your Headstand is solid.
- Crown of the head is on the mat — not forehead, not back of skull
- Forearms are pressing firmly and actively into the mat
- Elbows are shoulder-width apart — not wider
- Shoulders are lifting away from the ears
- Neck feels long and relaxed — no compression or pinching
- Core is engaged — belly gently pulled in
- Lower back is long and straight — not collapsed into an arch
- Legs are straight, together, and active — not hanging loosely
- Feet are flexed and reaching toward the ceiling
- Breath is slow, steady, and even throughout
- Face, jaw, and eyes are soft and relaxed
Learn Headstand Safely at Adishesh Yoga, Rishikesh
Want to learn Headstand the right way — with real confidence and zero fear? Come practice at Adishesh Yoga in Rishikesh. Our teachers give hands-on help at every step. You will not just try to go up — you will learn exactly what to do with your head, arms, core, and legs to make the pose stable and safe.
We teach traditional Hatha yoga in small, focused groups. Every class is personal, calm, and deeply effective. Whether you have never tried an inversion or you want to refine a pose you already know — there is a class here for you.
- Inversion workshops: Dedicated sessions on Headstand, Shoulderstand, and other inversions — taught progressively and safely from the ground up
- Daily strength prep classes: Dolphin, forearm plank, and core sequences that build exactly what inversions need — practiced every morning
- One-to-one attention: Small class sizes mean your teacher actually sees your pose, corrects your alignment, and supports you personally
- Safe, guided environment: Mats, walls, blankets, and spotting — everything needed to learn Headstand safely is ready for you here
- Experienced teachers: Trained in classical yoga with a deep understanding of anatomy, alignment, and safe inversion practice
Come to Rishikesh. Turn your world upside down. And feel the King of Asanas from the inside.
Frequently Asked Questions
Conclusion
Headstand is not just a yoga pose. It is a shift in perspective — literally and figuratively. When you finally hold it steady and breathe freely upside down, something changes in you. You realize your body is stronger and more capable than you thought.
Start with Dolphin. Build your forearms. Practice against the wall. Be patient with yourself. The pose will come — and when it does, you will understand exactly why yogis have been calling it the King of Asanas for thousands of years.
If you want to learn Headstand with real guidance and total safety — come practice at Adishesh Yoga in Rishikesh. We will guide you up — one breath, one step, one strong forearm at a time.
Explore Authentic Yoga in Rishikesh with Adishesh Yoga
Ready to refine your alignment, anatomy, and sequencing under traditional masters? Join our Yoga Alliance certified courses or unwind with restorative retreats in the Himalayan foothills.